
The good news:
There´s already a strong (and in some way powerful) binding between SharePoint and PowerApps. As you probably already know what I mean: I am of course talking about the PowerApps Custom Forms for SharePoint.
But – The Bad news:
The drawbacks of using PowerApps Custom Forms are well known. To name a few:
- The PowerApps Forms are always bound directly to the list. The solution is not listed in your app overview as a standalone app, which makes it hard to export your solution the way you would with Canvas Apps.
- You might experience some problems with the format, like too much whitespace. In our solutions with PowerApps Forms in tablet size, we were struggeling sometimes with these problems. Changing the screen size in the app settings could solve some problems, but sometimes it seems that some whitespace was added randomly again.
Our Solution – Binding Canvas Apps to SharePoint
It seems that we could solve most of the listed drawbacks of the PowerApps Forms by combining the advantages of PowerApps Forms (enter new and edit data directly from SharePoint Lists) and Canvas Apps.
So, in the end, we will just use the PowerApps Forms to hand over the selected SharePoint ID when editing the list.
So that´s what we did and we´ll of course explain you how we did it in the following paragraphs.
What we’ll do
- Create/use a PowerApps Canvas App that you want to bind to the SharePoint List and respectively want to use the New/Edit Buttons in SharePoint to hand over the params for the selected SharePoint item (ID)
- Use/create a SharePoint list with just a few example columns
- We will then use the Powerapps Customize Form Tool wich is integrated in all ShrePoint list (modern experience) already and change the settings for the SharePoint integration. This enables us to launch a new Canvas App by using the SharePoint standard buttons
- Configure the Canvas App to get the SharePoint list item and use the ID in a example form
Create a random Canvas App
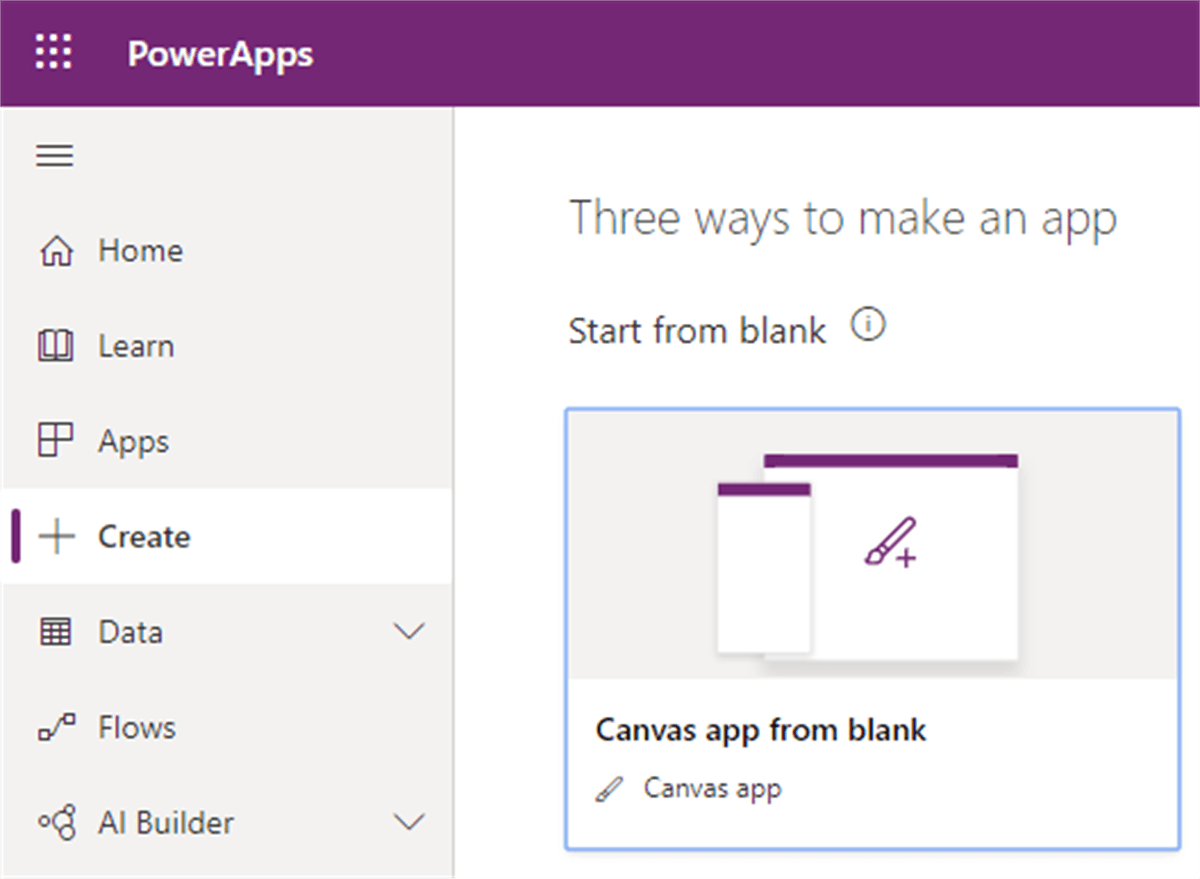
- Go to PowerApps.com or just select the app in your Office365 Portal
If you don´t already have an app in mind that you want to use, go to Create and choose Canvas app from Blank. Type in a name and save it in the cloud
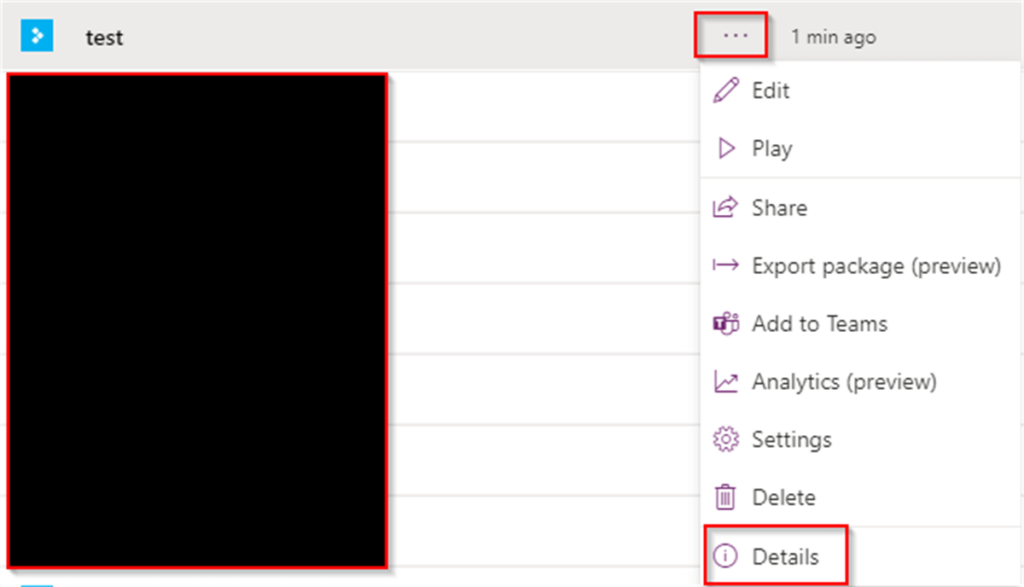
Now we just need to get the Web-Link for this app for the next steps. Go To the apps tab, search for your app and click on the three dots behind the app name. Then choose details. Now you can simply copy the web link and save it somewhere for later.
2. SharePoint Set up
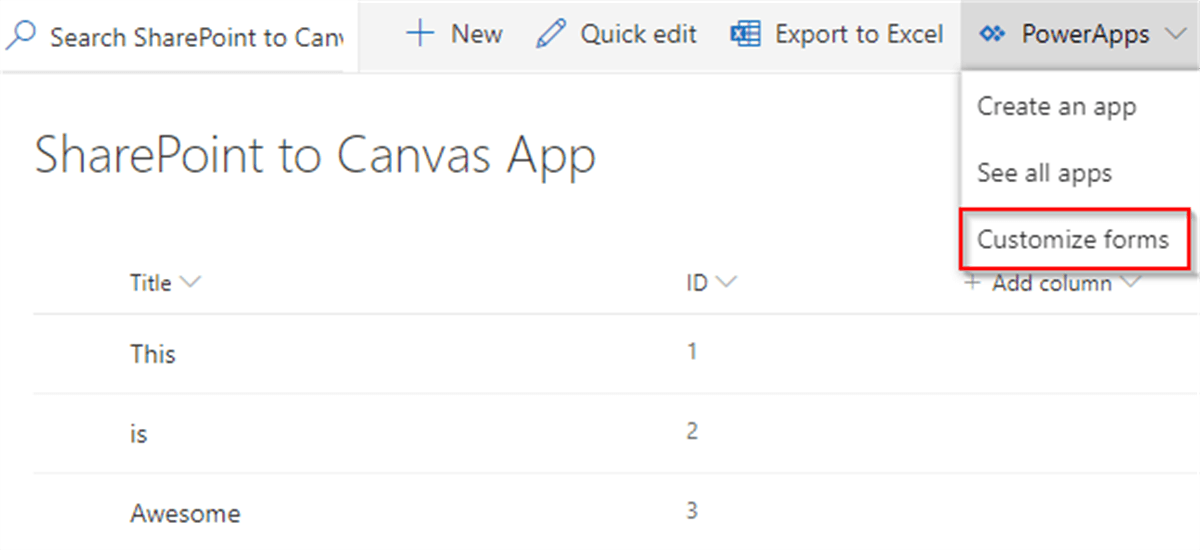
- Now we just create a simple SharePoint list. As mentioned, we don´t need a lot of columns, so we´ll just use a list that contains the title column and edit the view to see the standard ID-Column.
- Go to customize forms which opens the PowerApps Forms editor
You will of course get the screen with the standard PowerApps Form that you can customize. But we don´t need this anymore, because we just want to pass through the ID-parameters. To keep your screen clean, you can delete everything from the screen. I put in a label that says „redirecting“, but you can also drop it completely as the screen will only be visible for an instant. In the end, we just need the few things that are shown below.
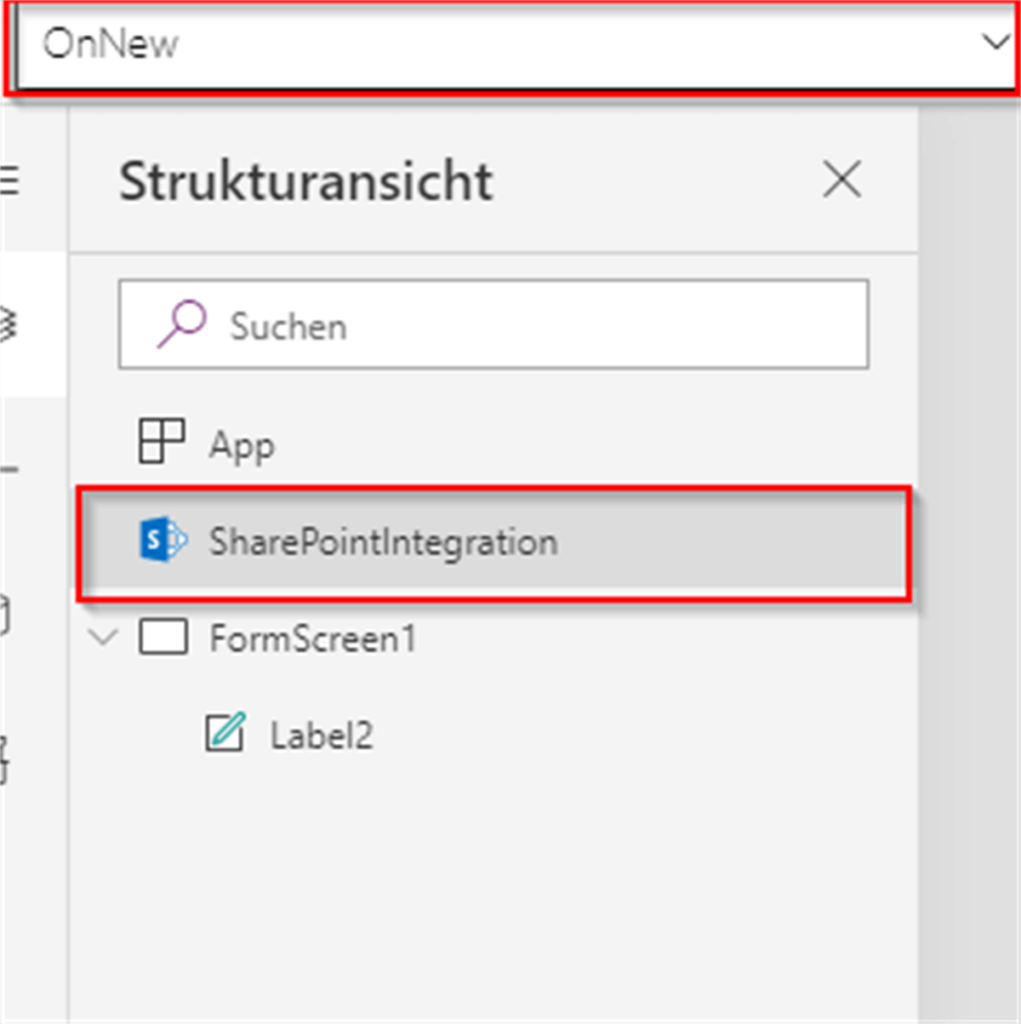
- Click on the SharePoint Integration in the Controls Menu and choose the property OnNew above. With this property, we can configure what happens when users click the New Button in the SharePoint List.
- Use the launch function, now paste in the web link from your Canvas App that you already saved earlier. As suffix, use the parameters &ID=0. In our scenario we use this to specify new items. The request hide action in the end closes the PowerApps Form window again (to ensure the users are not confused).
Formula: Launch(„Web-Link&ID=0“);;RequestHide()
Note: semicolons and quotes might differ for some regions
- Click on the SharePoint Integration again and choose the property OnEdit above. With this Property we can configure what happens when users click the Edit Button in the SharePoint List.
- Again, Use the Launch Function, now paste in the web link from your Canvas App that you already saved earlier. As suffix, use the parameters &ID=SharePointIntegration.SelectedListItemID
This is where the Magic happens, that will pass through our SharePoint ID.
4. Use the SharePoint ID in a Form in a Canvas App
- Go back to your Canvas App. In the App-OnStart Property, we will fetch the corresponding SharePoint ID (or 0 for new items) and create a global Variable „VarStartID“ for it. Type in OnStart:
Formula: Set(VarStartID;Param(„ID“))
Basically that´s it. We passed the SharePoint ID (and a zero for every new item). You can for example put in a label and set the text property to the Variable VarStartID - Now we will create a form in our app just for example purposes that works with our new solution. So we first need to choose our SharePoint List as a datasource to our app. Then create an edit form. For the DataSource Property in the Form Type, select your SharePoint List (Name). Now Add the preferred fields to your form.
- For the item property of the form, we will make sure that we will use our Variable VarStartID that we created in the OnStart property of our app.
Formula: If(Value(VarStartID)>0;LookUp(SharePointListName;ID=Value(VarStartID)))
- For the DefaultMode property of our form, we will now make sure that it is in new form when our variable VarStartID equals 0 and in edit mode when it is bigger than 0.
Formula: If(Value( VarStartID)>1; FormMode.Edit;FormMode.New)
Test it
Select a random entry in SharePoint and click on edit. Your Canvas app should open and show the form in edit mode for the selected SharePoint entry with the correct value for your SharePoint column.
